
Everyone knows how refrigeration works, right? There’s a big white box in our kitchens called a fridge, and it keeps stuff cold. Above the fridge is the freezer, where things are even colder. By the time we’re three, we know one door is for the orange juice, and the other for the ice cream. What’s so complicated?
Of course, we all know there’s more to it than that. But on a basic level, a standard 18 cubic foot refrigerator and a 3,200 cubic foot walk-in freezer (see below) are remarkably similar. They both depend on insulation, compressors, refrigerant and blowers to function. It’s like comparing a Mini Cooper to a tractor trailer: the concepts are the same, but you’ll never see a Mini towing a tanker of fresh milk.
As a farmer who sells his food directly to the public, the importance of reliable refrigeration can hardly be overstated. Food safety requires proper temperatures, but I also need space to receive, organize and pack my products. Just like a restaurant or a supermarket, having a large refrigerated space is crucial for farmers’ markets sales, or for CSA farms keeping product cold in advance of weekly pick ups. The following is a photo-blueprint of how we built our own walk-in from scratch, using standard 2X4 construction, our own labor, and two specialists who helped perfect it.

You gotta start somewhere. Here, we’re building onto our existing freezer shed and loading dock, which house two conventional ‘locking panel’ walk-in freezers. Jim is laying out the footer dimensions with string. Excavation will follow.

Digging the footers. Things rarely go as planned, and I rented a jackhammer to break up some stubborn rocks. The bandana wins me style points.

The footers are poured, the block laid, and next comes 4 inch pipe spaced at 4 foot intervals. This isn’t for drainage; it’s to allow warm air to flow beneath the slab so the penetrating cold (from the freezer above) won’t heave the subsoil and crack the concrete. (In photo #11, you’ll see the breather caps protruding above ground).

Gravel comes next. This IS for drainage, to keep water away from the slab and provide a level area for the insulating foam sub-surface.

The foam underlayer. Made partially of soy, this insulation is blown in a 4 inch thick sheet, and will provide insulation superior to the injected foam panels on my older walk-ins. This is sprayed by a specialist from tanks on a truck.

A closer look at the foam. Once cured (about 2 days at 70 degrees), it becomes VERY firm… not as hard as concrete, but extremely rigid. Take special note that we left plenty of footer exposure along the edges. This will allow us to ‘tie’ this foam to fresh foam later on, after we’ve built the walls and ceilings. In effect, we’ll create a foam box within a wooden box (i.e., the building itself). Make sense?

Next, we pour our concrete slab OVER the foam. Told you the foam was solid! This will be our floor inside the walk-in, and the foam beneath will provide our insulation. This slab is 22×20 feet, and will later be treated with an anti-slip epoxy sealer.

A closer look at the slab and foam. When exposed to sunlight for a few days, the foam turns from green to yellow.

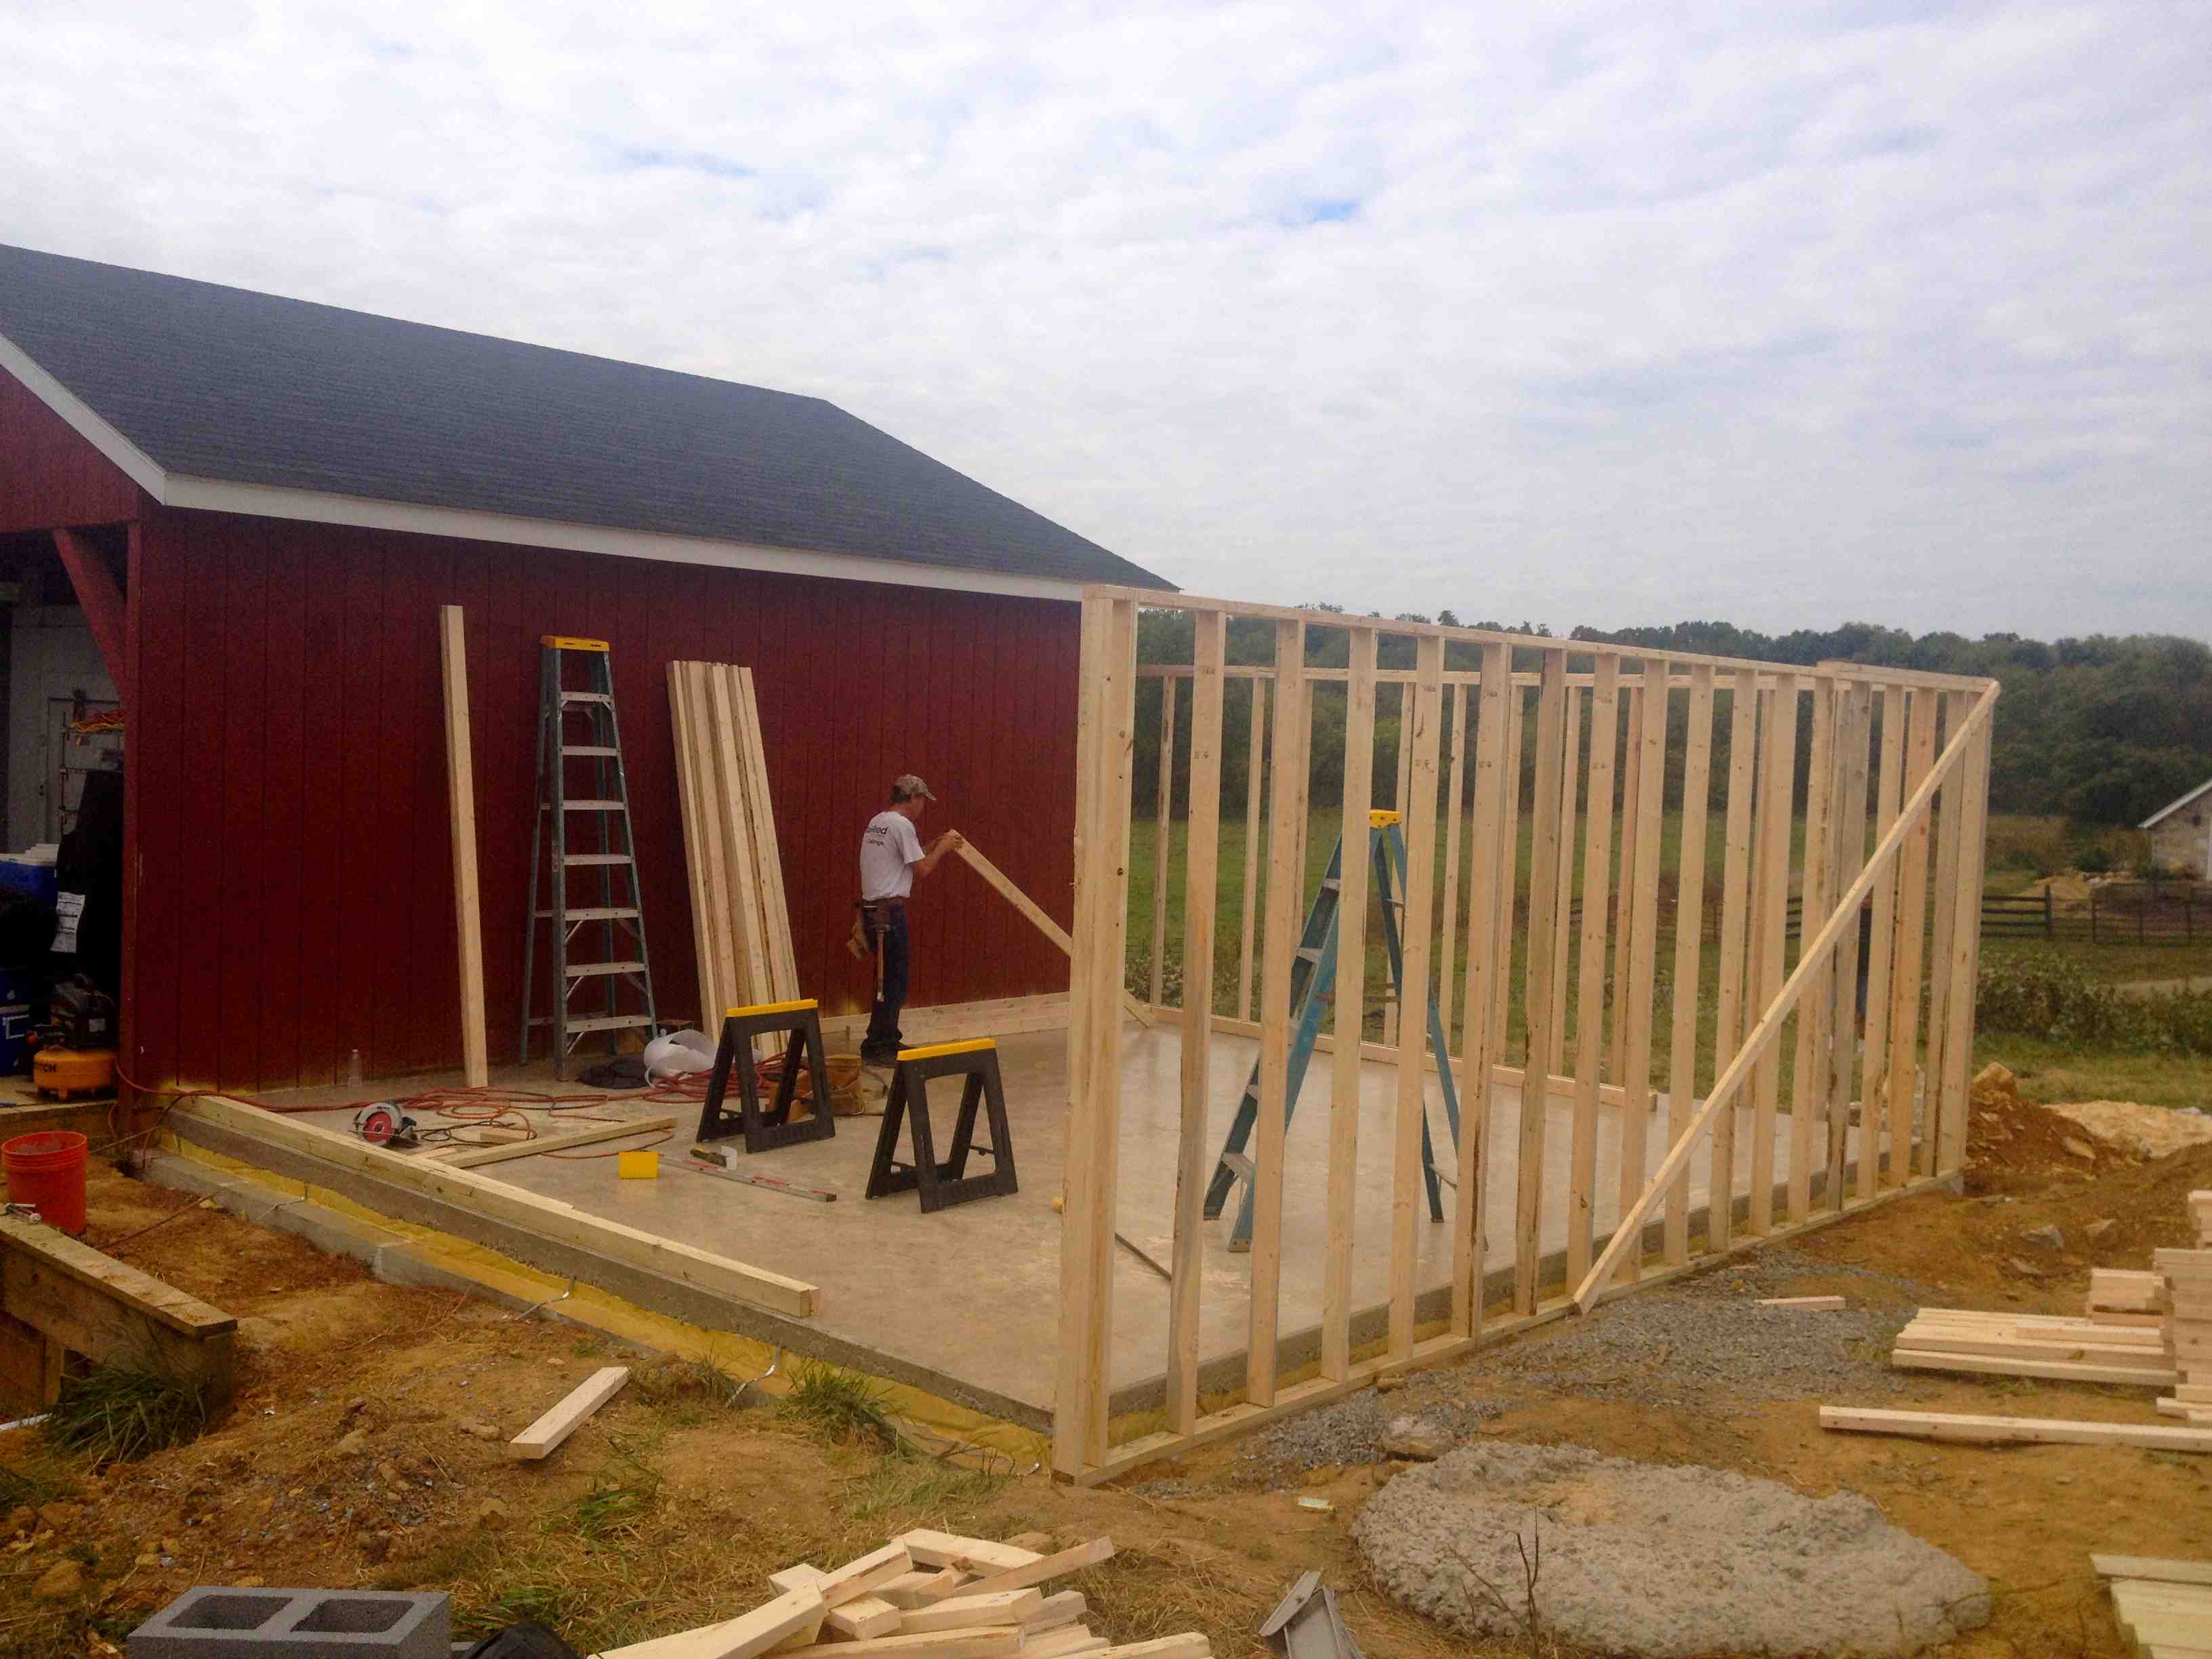
Next, we build on top of the remaining exposed footer. We’re building double walls here, one on the inside slab and one on the outside footer, the studs offset by six inches. This is important because it allows the foam to be sprayed in such a way that there’s no ‘break’ in the insulation. In other words, the foam will serpentine around the offset studs.

Here’s a closer look at the offset double wall studs. Notice how the underlaying foam remains exposed, so we can connect it to the next application of foam and complete our foam ‘box’ without any breaks.

Photo #11, showing the exposed pipe breathers.

The interior sheathing has been installed on the walls and roof, and now the foam is applied to the walls and allowed to expand.

Once the foam expands, an assistant scrapes the 2×4 studs clean with a special knife, so the exterior sheathing will have a flat surface for nailing.

An extra inch or two is added in the attic because we all know that heat rises! This is applied with less attention to aesthetics, as there will be no plywood sheathing here. Again, this foam looks soft but it’s almost rock-hard once cured.

Getting closer. Next, we glue and install glass board (you’ve seen this product in gas station restrooms), doubling as a moisture barrier as well as an easily cleanable surface.

Our second specialists, installing wiring, compressors and evaporators on the outside…

…and the fans and defrost coils on the inside. The freezer will be calibrated to an arresting 0 degrees fahrenheit. All of the interior walls will be sheathed in glass board, and shelves will be erected to store our meat.

The nearly finished product. Still needs some grading and gutters, but no job is ever truly finished! We built it with a 60 inch door to accommodate a pallet jack. If everything goes as planned, it should serve our farm for many decades. The interior is 3,200 feet (19x21x8 interior), and will house thousands of pounds of beef, pork, lamb and chicken. The project cost $45,000 in labor and materials, funded 100% through sales at farmers’ markets.
Check out my books!
| Gaining Ground | Growing Tomorrow | Start Your Farm |
|---|---|---|
 |
 |
 |


Leave a Reply