

Now that we’re entering the chilly season, many market customers have been asking if we’ll sell broth again this year. We previously sold a broth made from our beef and turkey bones- it may yet reappear! In the meantime, here’s my basic beef bone broth recipe:
- 1 pack Smith Meadows grass-fed/grass-finished soup bones (2 lbs or so, defrosted)
- 1 onion
- Smattering of whole cloves
- Splash of dry white wine or vinegar
Note: If you don’t have a slow cooker, a pot on the stove will do and 4 hours will get you a nice broth. The longer steep time leaches more minerals from the bones and tends to result in a more gelatinous broth.

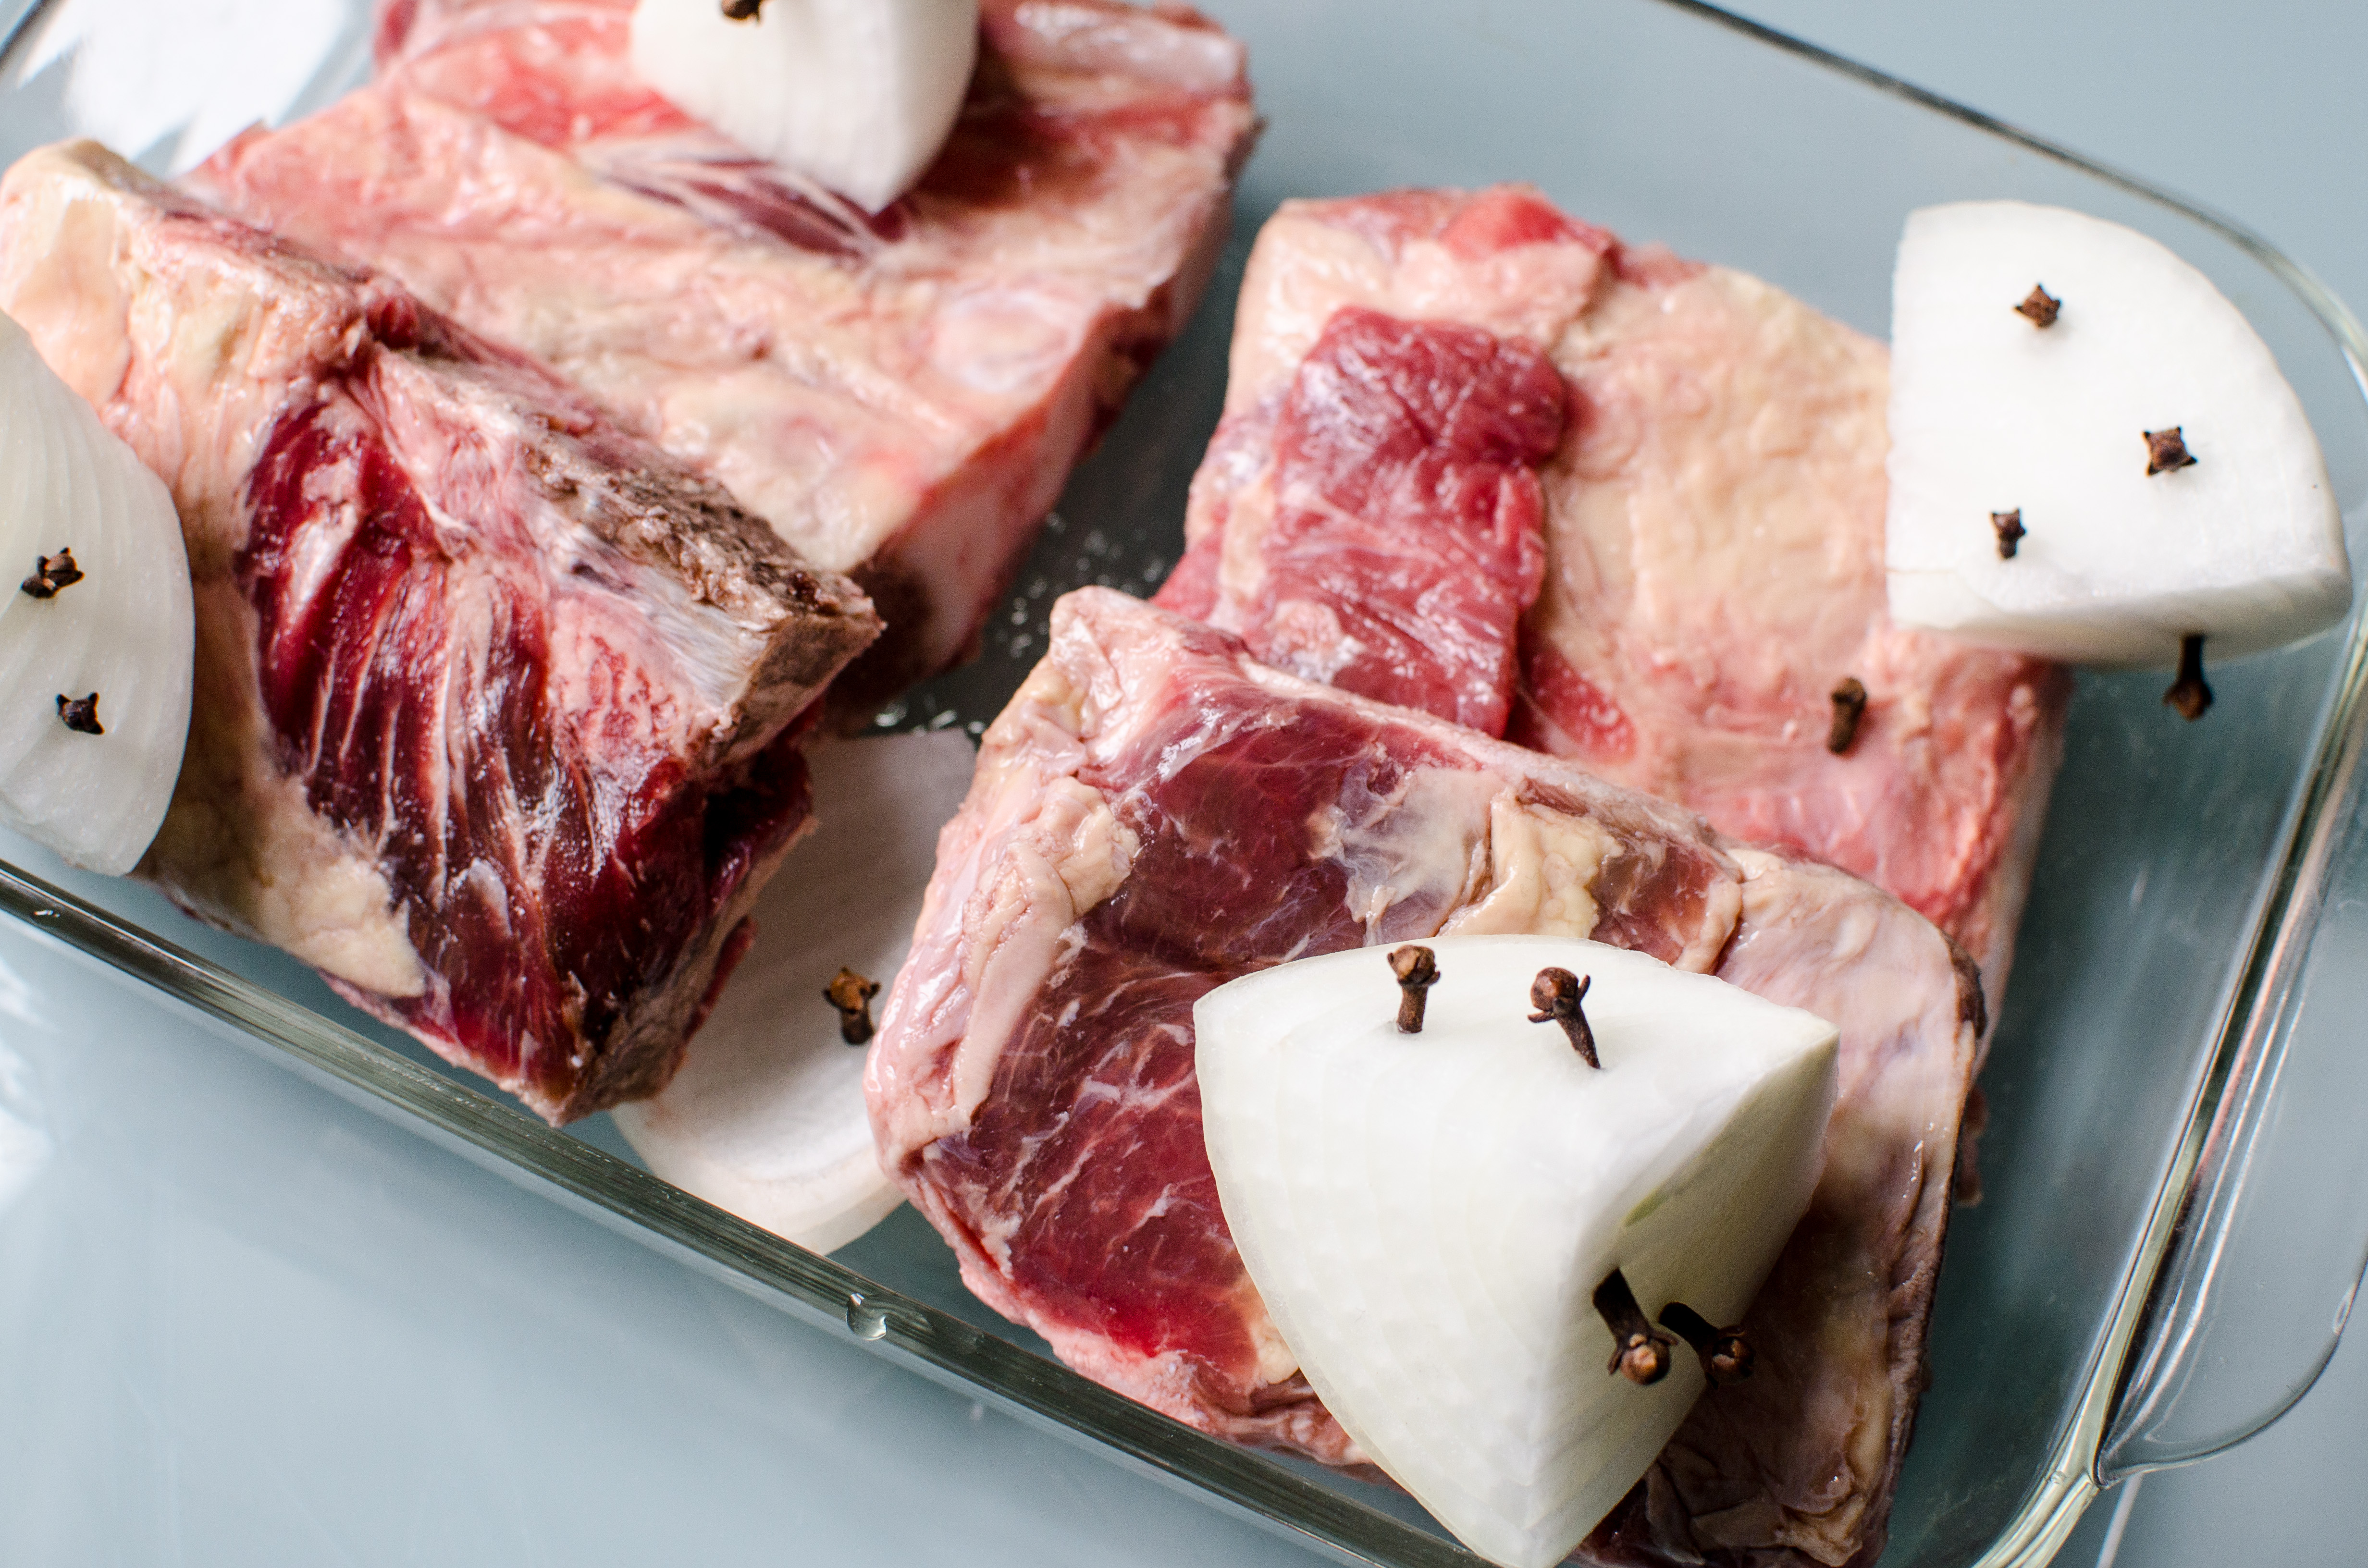
A sample of our beef soup bones- each pack is different, often some knuckles and collagen rich pieces with a little meat on them.
- Turn oven to 350F and start a kettle of water boiling.
- Arrange beef bones in a Pyrex baking dish that will hold them with a little room to spare
- Trim (or not) and quarter a large onion and stud it with cloves (see photo). Arrange it around the beef bits in the baking dish.
- Pop the whole shebang in the oven for around 30 min, until the edges of things look browned.
- Remove from oven and immediately deglaze using the wine or vinegar (ie pour it into/over the bones and shake things a bit).
- Scrape everything including the stuck bits in the bottom of the baking dish into your slow cooker (mine is just a 4 qt, 5 qt would be a little better) and cover with the boiled water.
- Bring to a boil/steady bubbling on high and then turn your slow cooker to low for about 24 hours.
- Turn slow cooker off and let cool a bit so it’s easier to handle. Place a strainer large enough to hold the bones over a pyrex or metal bowl large enough for the liquid and pour contents of slow cooker through. Shake the strainer a bit to get all the liquid out. Discard the remnants.
- Cover and let the broth cool, then place in the fridge until any fat has solidified on top, a few hours. Simply crack and pry up the fat, scraping broth off the underside, and reserve it for cooking with (I keep mine frozen)!
- Depending on the batch of bones, your broth may be somewhat or very jiggly (see a sample below)! Either scoop or pour into smaller containers or ice cube trays, refrigerate for up to one week or freeze. Enjoy!
For more on Bone Broth, Nancy weighs in here in an earlier blog post on soup making. You can also check out this helpful page from Nourished Kitchen. For a dose of skepticism on the healing powers of broth, try this piece from NPR’s The Salt. Maybe it’s a placebo effect, but I’ve thought bone broth boosts my immune system and promotes strong hair and nails. It’s definitely tasty and comforting on a cold day!


Leave a Reply